爬取原因是RSSHub有一个订阅微信公众号的第三方源是二十次幂,但是这个网站需要开通VIP才可以搜索公众号。
接着就有想爬下数据然后订阅自己想要的公众号。
2. 准备工作
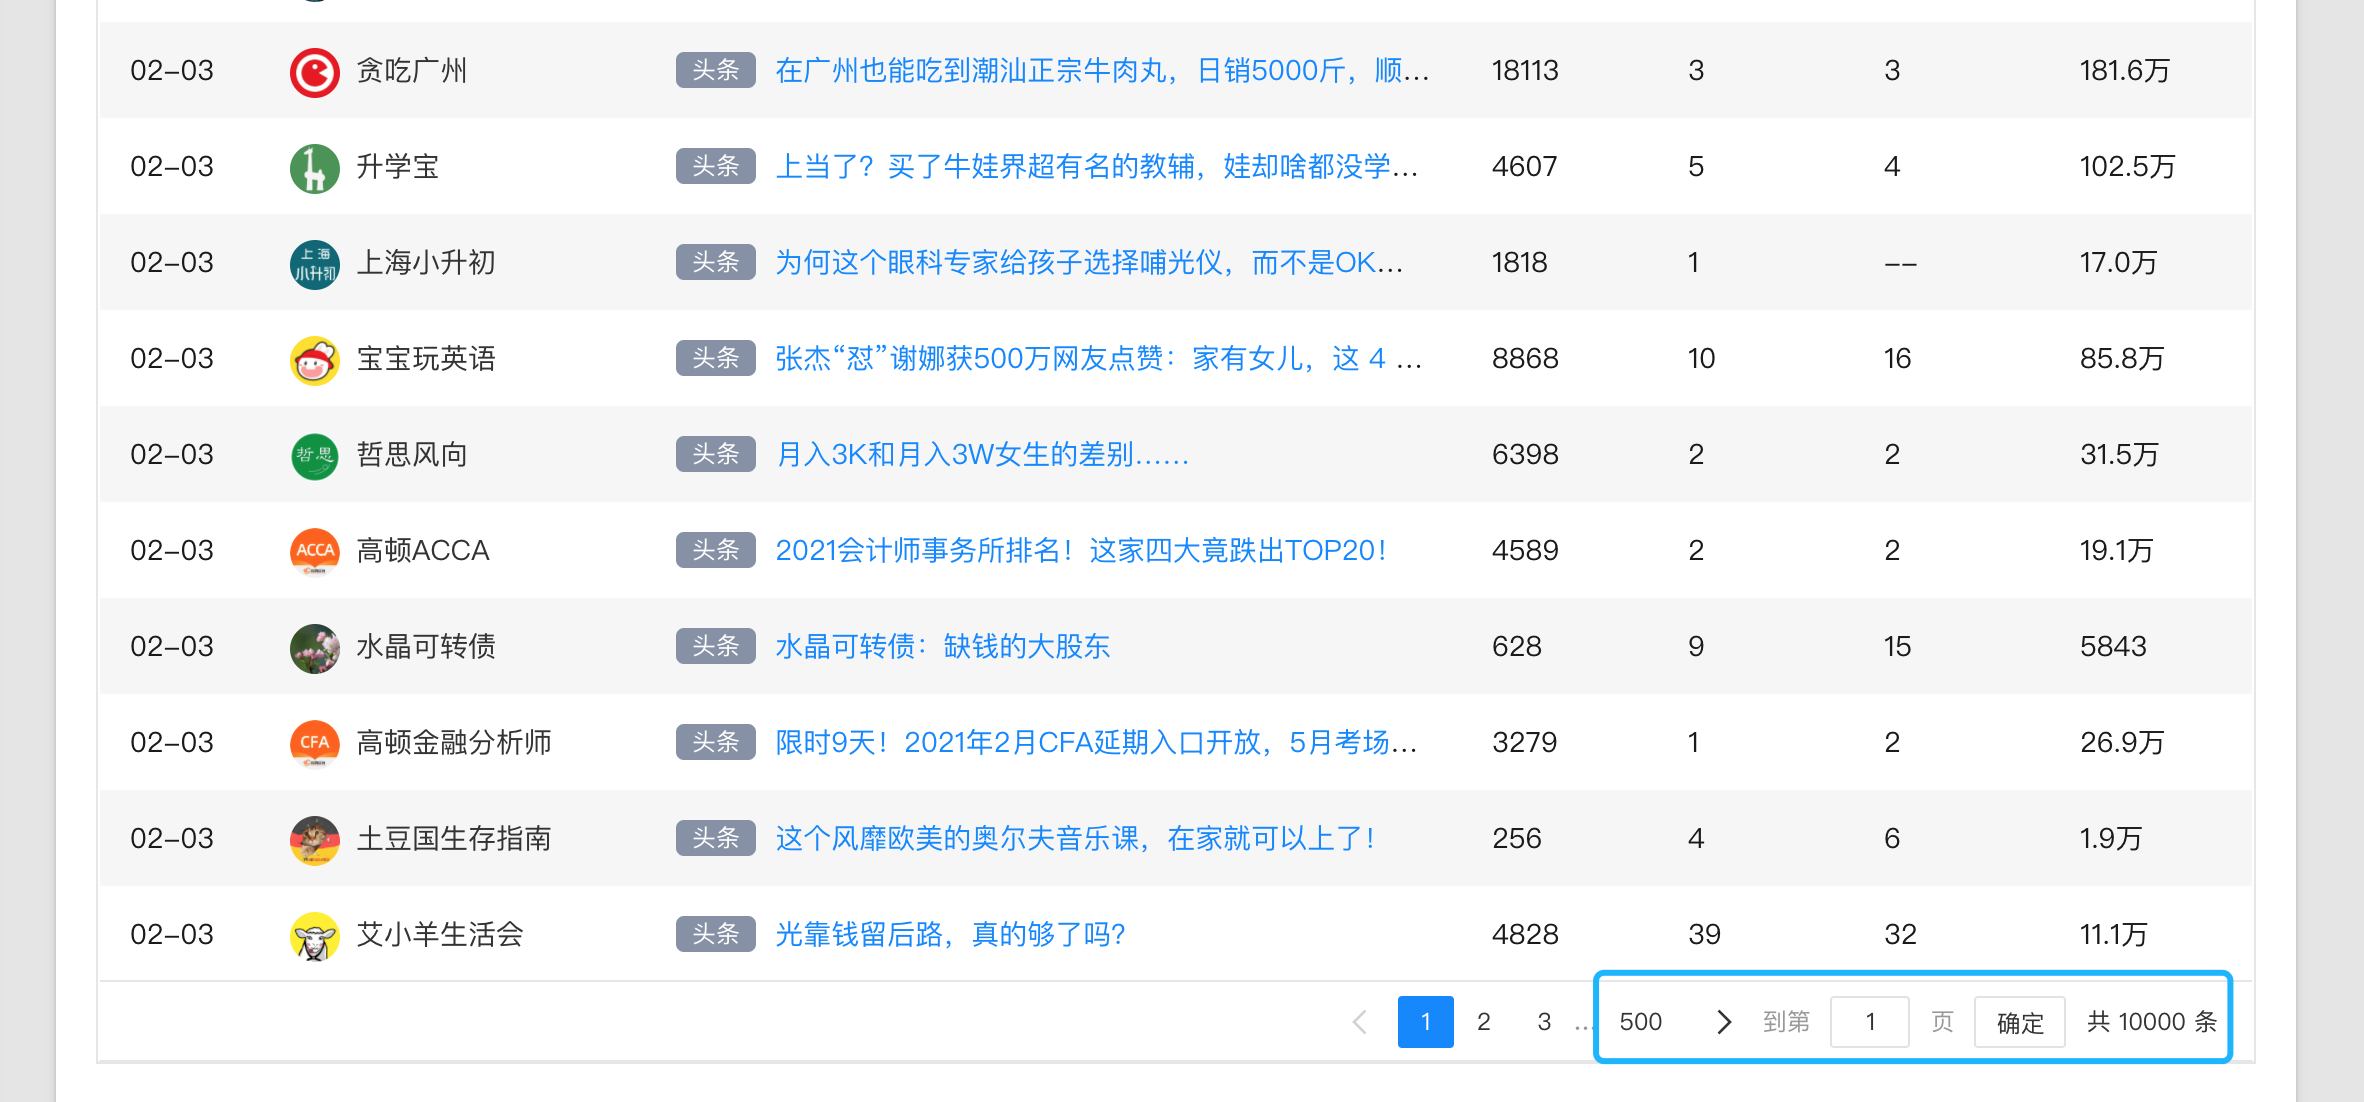
首先,看见了有大概500页的数据,接着我们F12看看NetWork栏目中的数据。
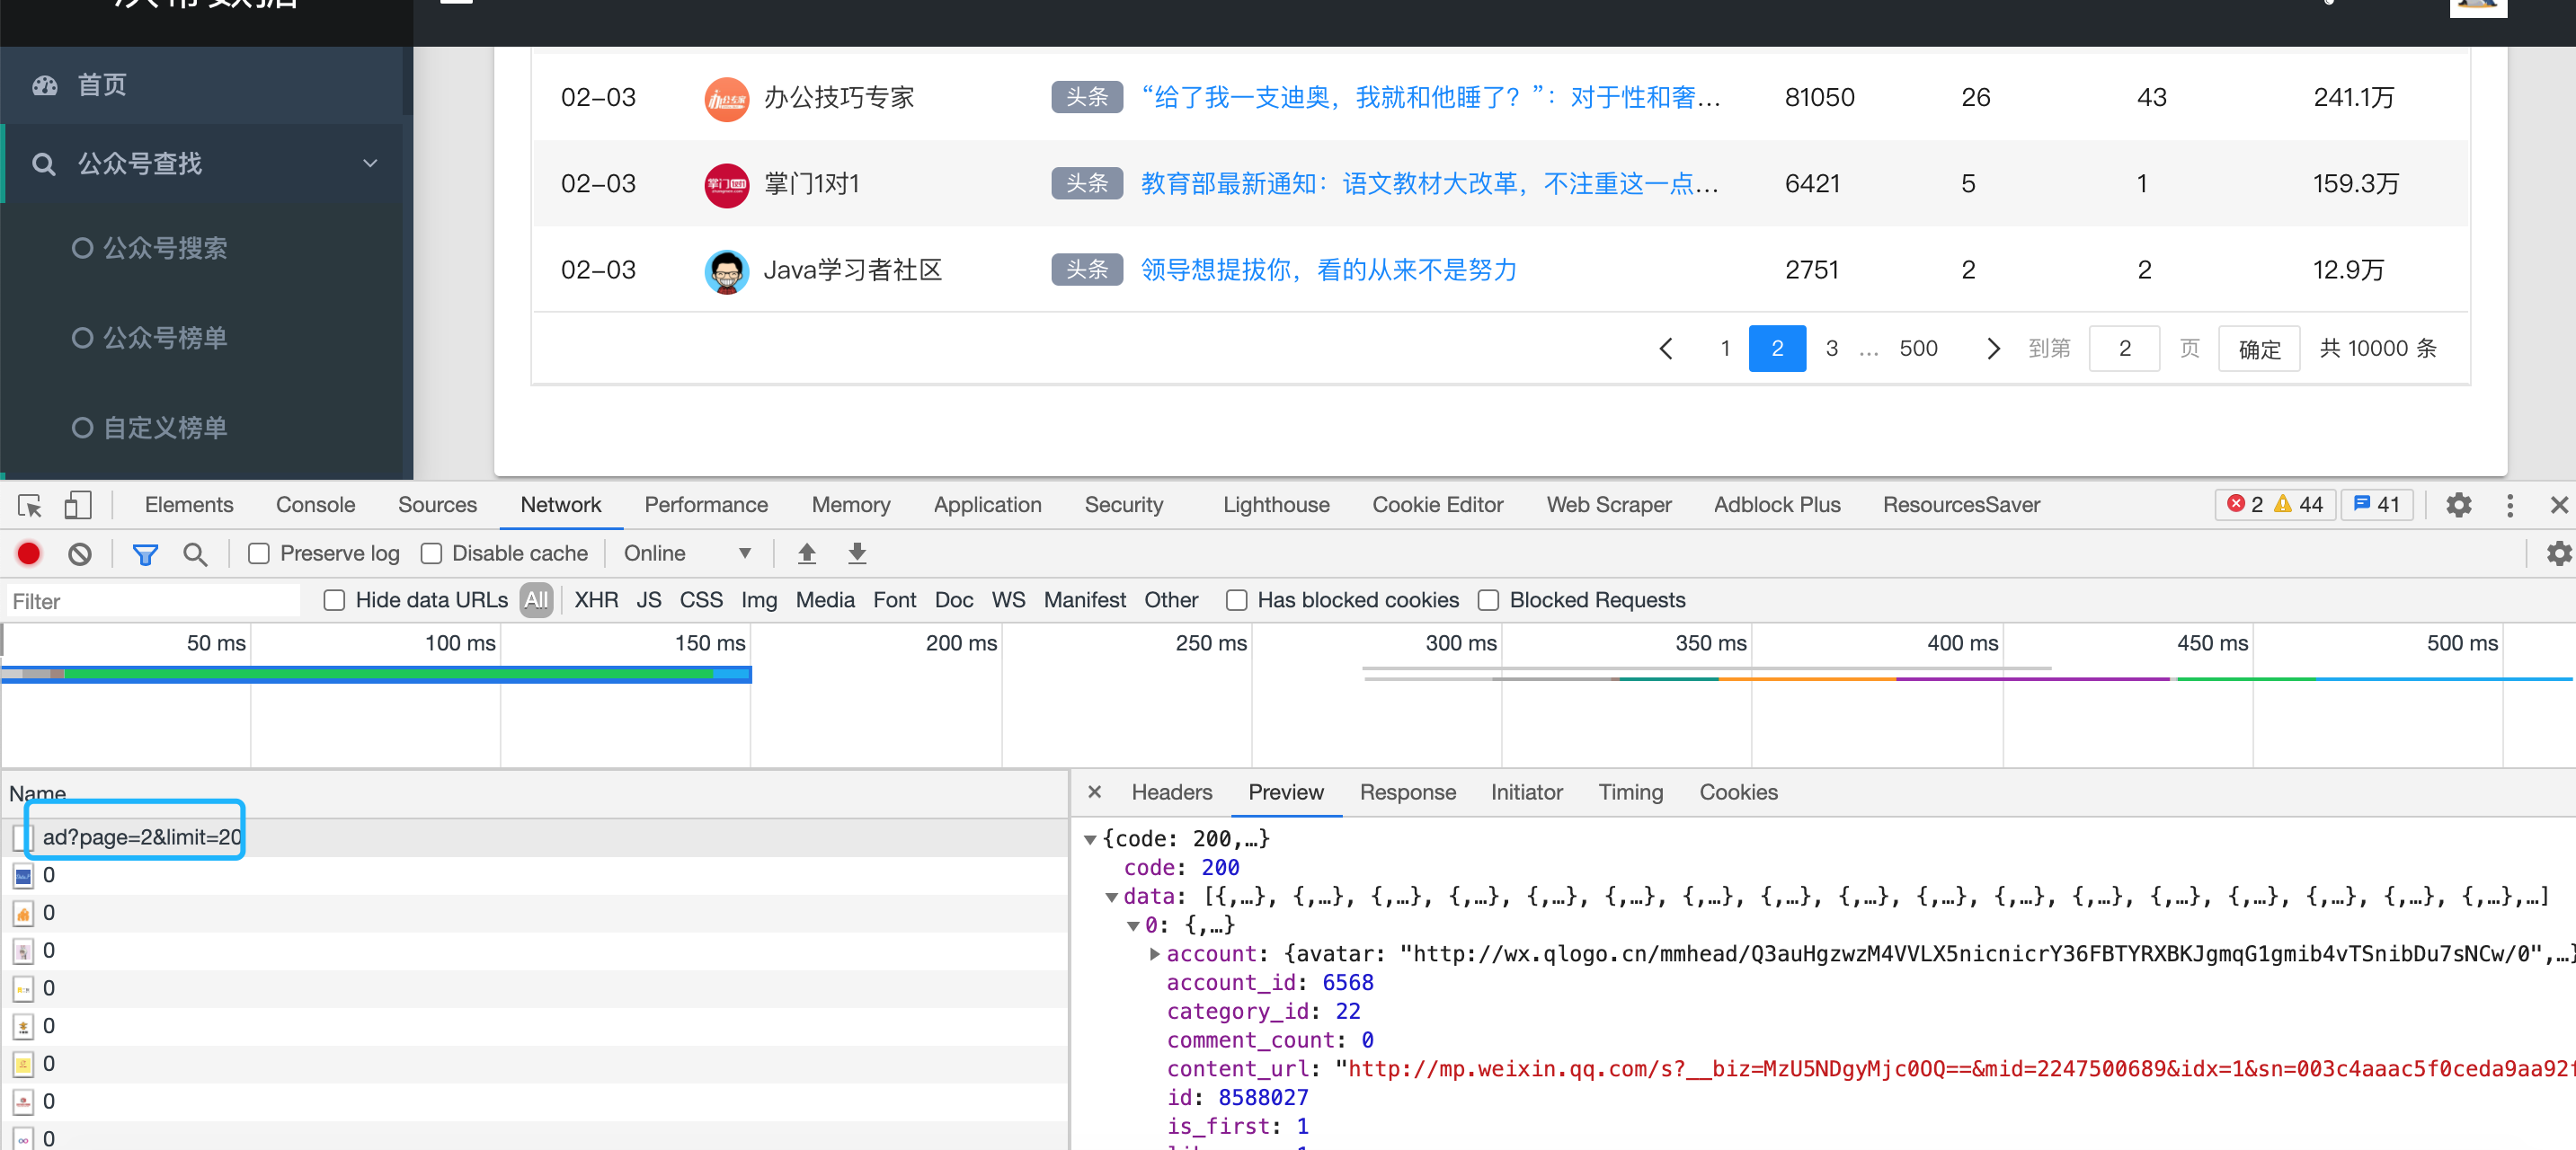
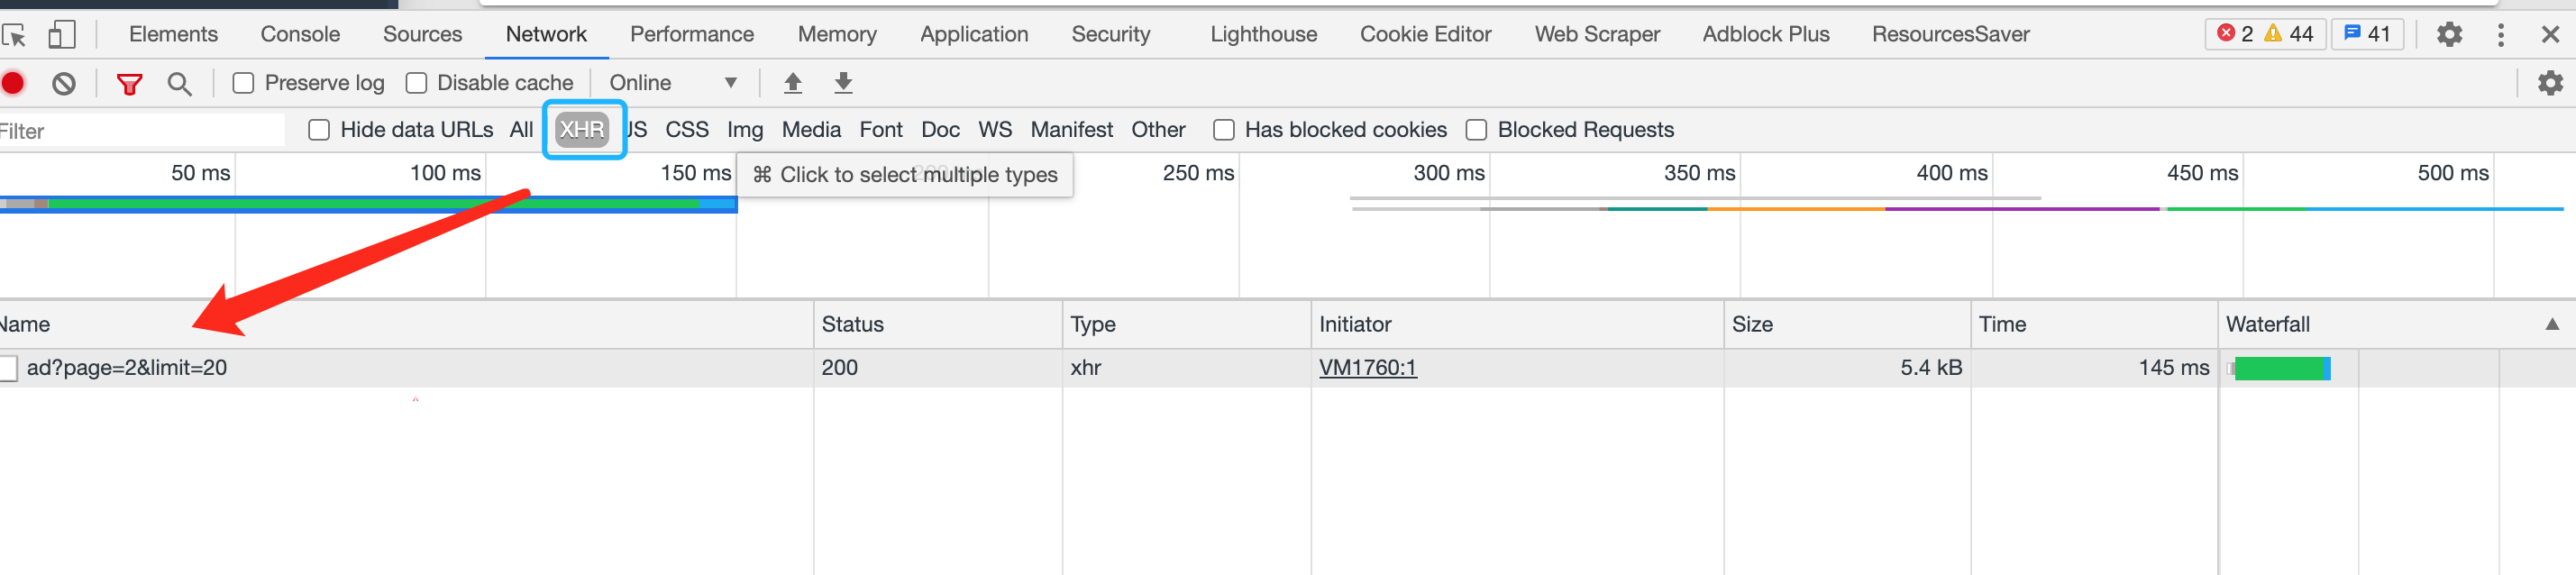
或者直接勾选XHR就可以发现这个是一个Ajax请求
接口返回了已经整理好的数据,所以我们不需要二次整理。
直接编写代码(Java)
3. 编写代码
import cn.hutool.http.HttpRequest;
import cn.hutool.http.HttpResponse;
import cn.hutool.json.JSONArray;
import cn.hutool.json.JSONObject;
import cn.hutool.json.JSONUtil;
import org.junit.Test;
public class test {
    @Test
    public void asd() throws InterruptedException {
        StringBuilder result = new StringBuilder();
        for (int i = 1; i <= 500; i++) {
            HttpRequest request = new HttpRequest("https://www.ershicimi.com/api/search/ad?page=" + i + "&limit=20");
            HttpResponse response = request.execute();
            JSONObject parse = JSONUtil.parseObj(response.body());
            JSONArray data = parse.getJSONArray("data");
            for (int i1 = 0; i1 < data.size(); i1++) {
                JSONObject object = data.getJSONObject(i1).getJSONObject("account");
                result.append(object.get("nickname")+"----"+object.get("bid")+"\n");
            }
            Thread.sleep(1000);
        }
        System.out.println(result.toString());
    }
}
这里引入了Hutool这个工具包,大家需要自行搜索Maven引入
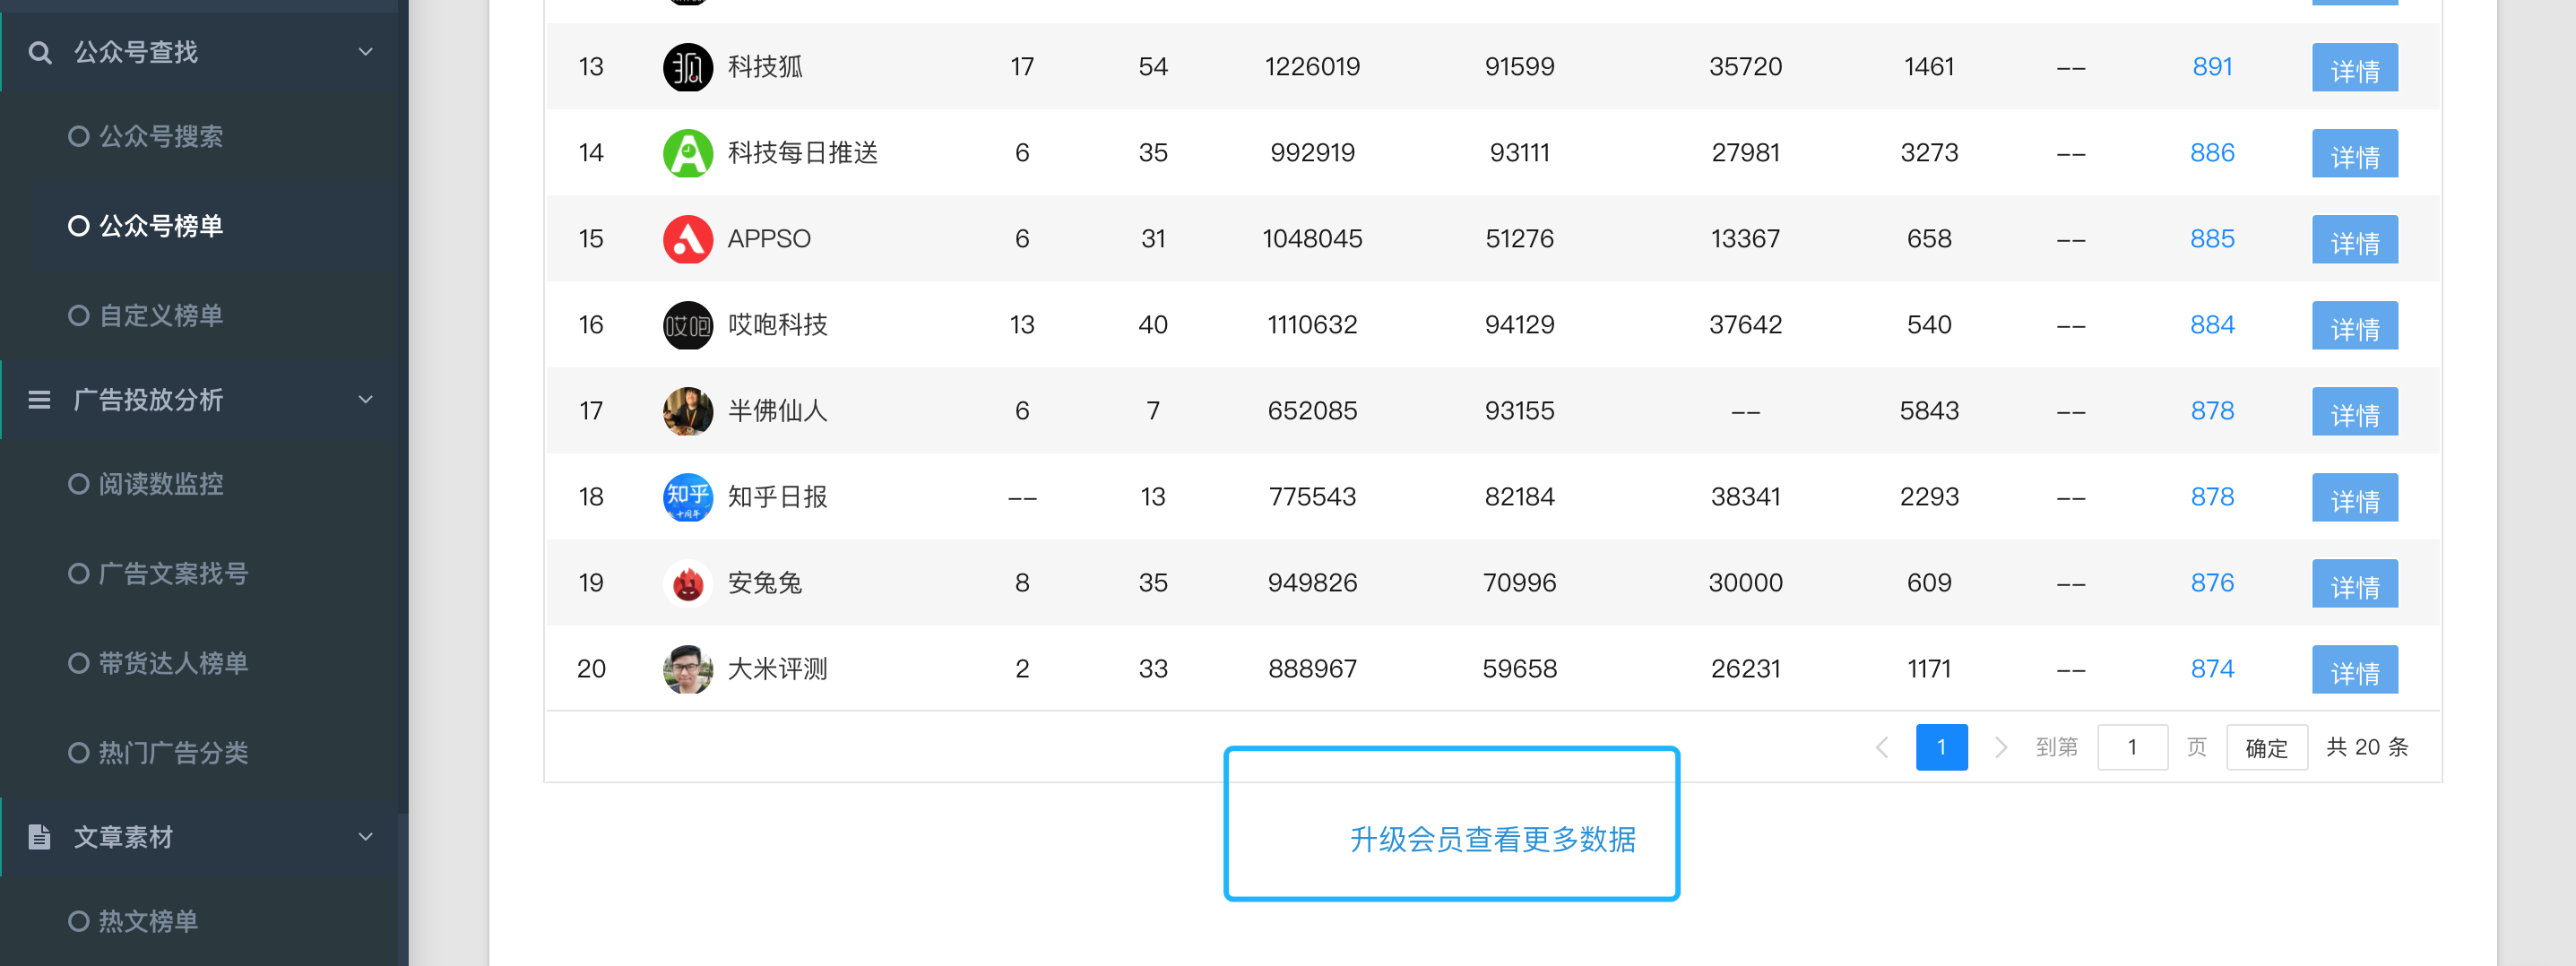
4.效果
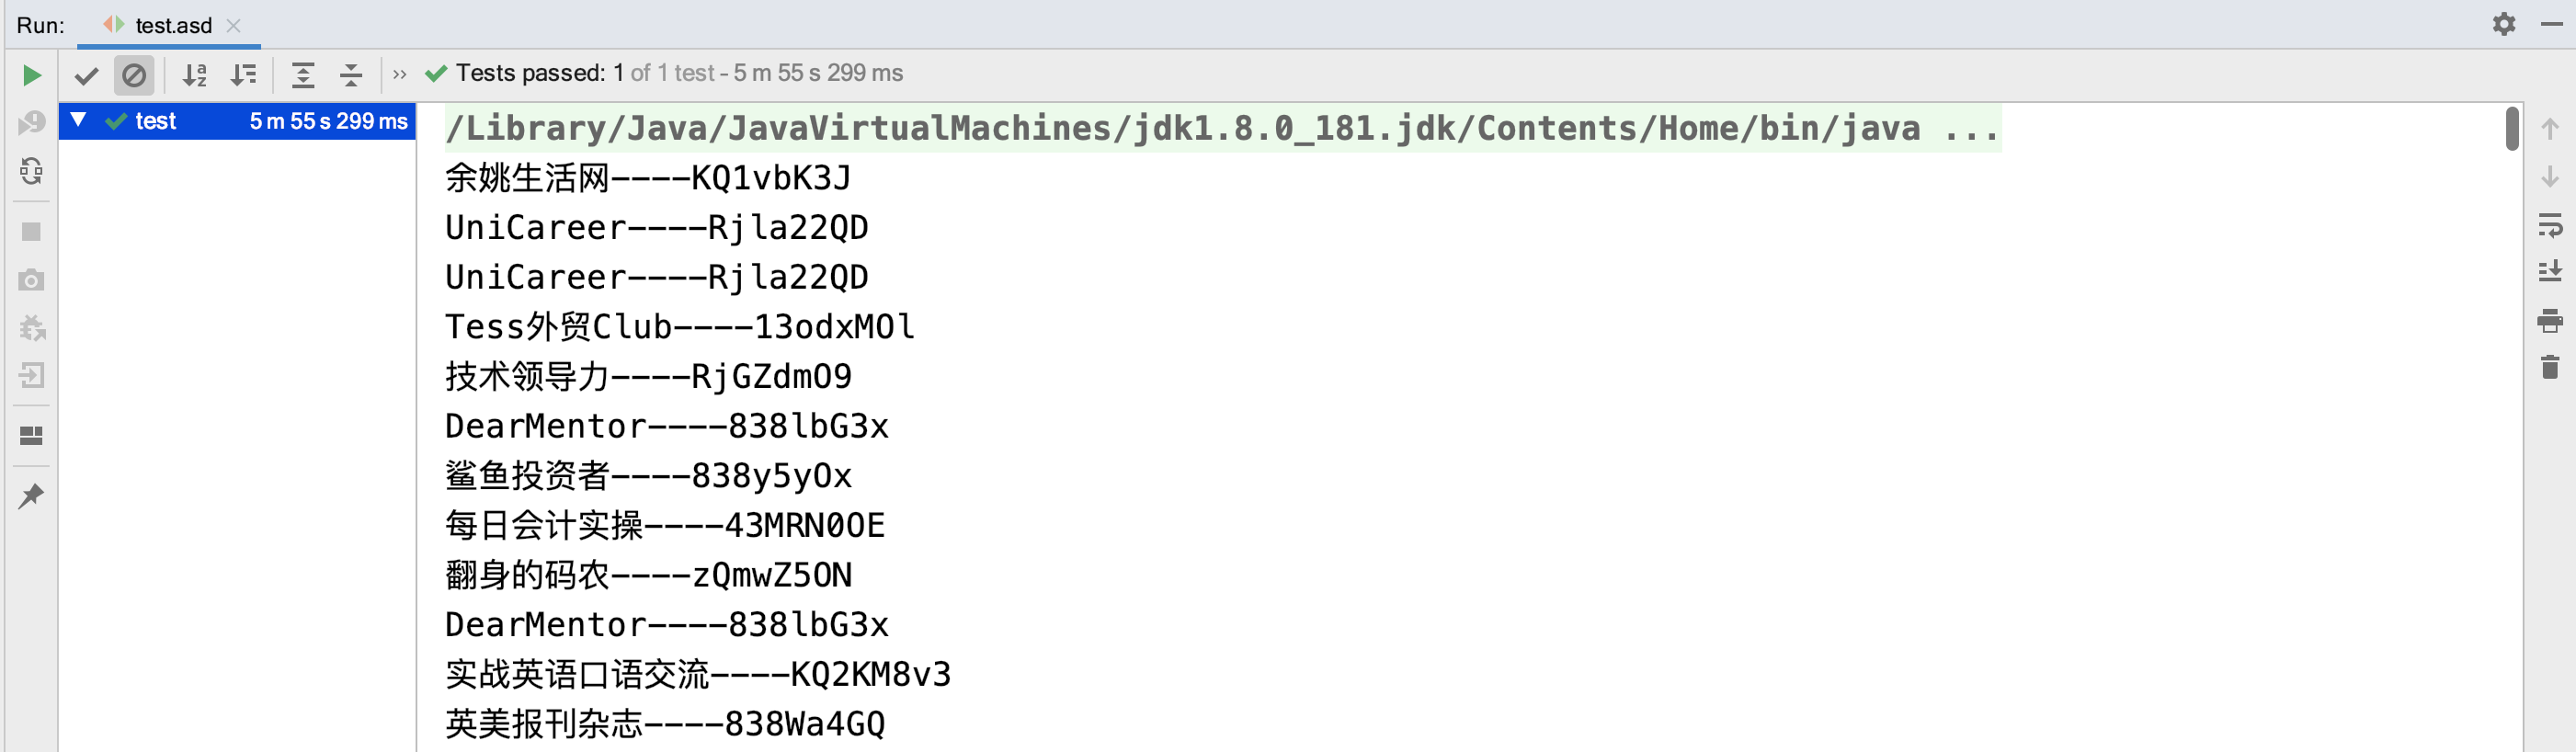
等待执行完成之后,查看效果。成功获取数据
注意事项:
接口会限制请求频率,所以我设置了1秒请求一次。这样子不会请求频繁
结尾
仅供学习参考,不可非法
]]>